Foodie Penpals

It’s that time of the month once again… no i’m not talking about my period!

­­I’m talking about the Foodie Pen Pal’s grand reveal day!! Yeah!  <fireworks. boom . boom. boom >

The Lean Green Bean

So what’s foodie pen pals you may ask? It’ s this awesome idea started by Lindsay of The Lean Green Bean where at beginning of the month you’d be paired with a food blogger or lover and  send and receive a box, parcel, package or what have you of amazing treats and yummy goodies. Then you get to bottle up all your excitement and wait till the end of the month when you can reveal what you’ve received. Exciting isn’t it?

But Lyna  it’s not the end of the month?! Well not all roses are red and the mail system is not without its delays! We had a little trouble with our mail and did not get our package in time. But all is well and we got our package in one piece! Yeah! As they say it’s better late than…to  forever wait?!  (I totally made that up)

Let’s get to it. So last month we were paired with the nicest and the sweetest girl (Uru) who literally has an equally nice and sweet blog gobakeyourself. This girl can really bake,  armed with serious baking skills she comes up with the meanest recipes that involve loads and loads of chocolates she’s not called Choc Chip Uru for nothing. But I must warn you though, visiting her site will make you gain a couple of virtual pounds and eventually WILL MAKE YOU FAT! Lol

So having said that, let’s see what she got for us.

Uru sent us quite a package, we had a little of everything from sweet, salty, spicy/chilli, savoury and chocolate-y just as we wanted!

Upon opening the box, first thing we tried were the lamington fingers, these were fluffy sponge cakes covered in chocolate and then dipped in coconut shavings! I know… yummy!

She also sent us these mini samosas, which were these little triangular tasty bombs. Eating it was literally an explosion of Indian spices in your mouth, they’re packed with so much flavour with an hint aftermath of heat! Burn! Since we love spices…she also sent us the mother of all spices…Curry Powder!

And to cap all that savory goodness who could resist a bar of Cadbury Fruit & Nut chocolate…

Thank you so much Uru for these yummy treats!

If you want to know more about Foodie Penpals or  join in the fun exchange click here.

D.I.Y. Wipe Board

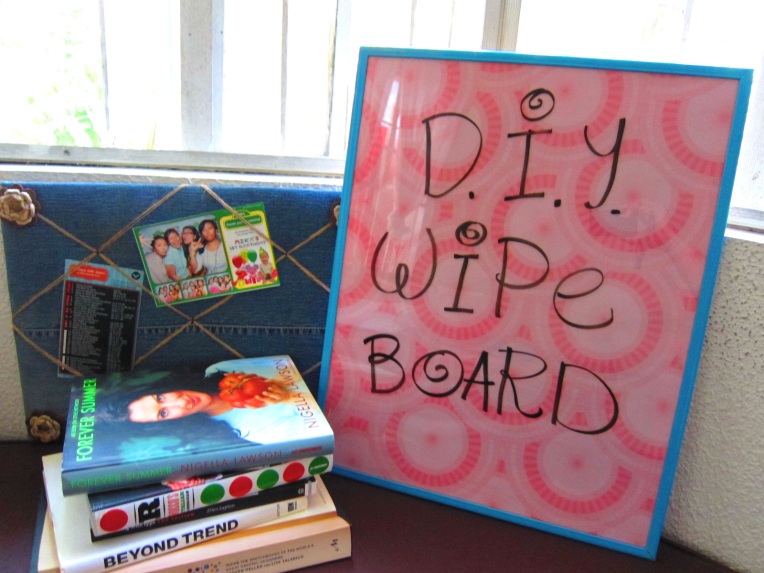
DIY Wipe Board

So we’ve been itching to put our hands on something productive this past few days, like a project of some sort! You know just to keep the mind from idling and keep the creative juices flowing.

Then we remember we did a renovation on one of the rooms in the house and have kept  some a lot of the stuff the we thought we could rescue, re-use, recycle, refashion and what other RE-‘s you have in mind. But it has been two years since we’ve last seen these projects-to-be (Yes we have a knack for forgetting, actually more of procrastinating). It’s all tucked in a room outside the house (like a toned down hoarders episode) away from all the clean-ness and organized loveliness where no one can see or remember it. Haha!

We didn’t want to be overwhelmed by all the things  that were waiting inside that little room, so we decided to take on an easy project.

Having said that…that’s when we found this!

Let’s do this…

Here’s what we’ll need

  • an old picture frame (ones with glass not plastic)
  • newspaper or masking tape
  • gift wrapping paper
  • scissors
  • tape
  • spray paint (optional)
  • white wipe board markers!

1. Take out the glass and the picture it came with and line the inner part of the frame with newspaper.

2. Spray paint the frame. (Remember to protect your “painting area” you don’t want to leave paint marks everywhere!)

3. Cover the picture with gift wrapping paper.

4. Once the paint dries, take the “picture + glass” and put it back on the frame (You can clean the glass from finger prints with a lightly damp newspaper before putting it back.).

Voila.. you now have your very own  wipe board!

Happy wiping/ writing! 🙂

Pins-pirations

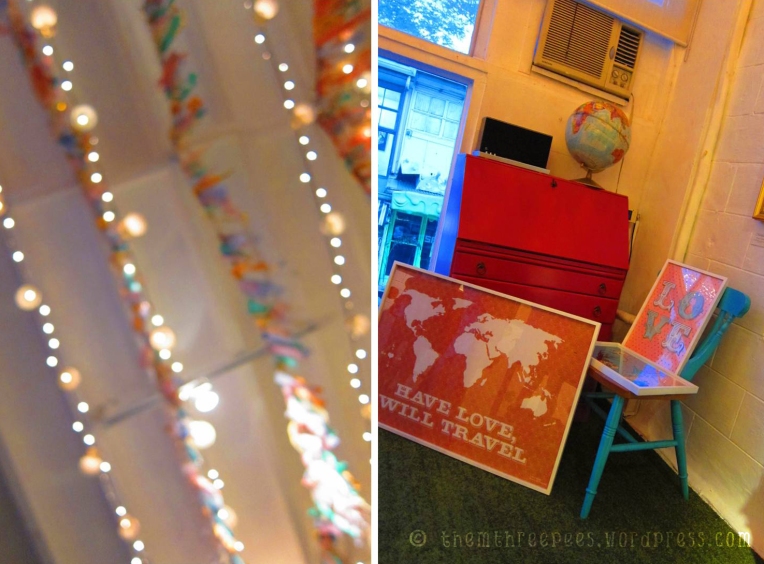
Since my sister’s and I, the entire family’s really into DIY stuffs especially those shabby-chic-pinteresty types. We’ve been on a constant look out for some inspiration…. and when we were out on one of our trips to the north one day we saw this little store (heima) and  boy what inspiration did we find!

It was like being in a coma and waking-up in pinterest heaven!

The place just lives and breathes design sponge!

They even had these– view master. Wooow! We use to own one of these when we were little talk about major nostalgia so just imagine our excitement. We were totally fighting over who gets to play with it first…childish i know..NOT 🙂

Everything was just so cute and pretty, we wanted everything in that store but the stuff were a little pricey. Good thing the owner allowed us to take all the pictures that we wanted! Now we get to share the inspiration with you, yehey! enjoy!

Heart Shaped Pancakes : )

Hey there!

Ok, so I’ve been putting off writing the first post on this blog probably because of lack of inspiration or just plain-old timidity?! Well now that the dry spell’s over allow me to officially welcome you to our blog. Hoorah! Boom. Boom. boom * fireworks*

A few months back my sister (Ross) stumbled upon this awesome easy to do Martha Stewart Heart Pancake recipe! I know right! Was already sold on the pancake part, and Martha Stewart that’s just ssssweet! I know you can’t wait coz I can’t. So let’s do this.

Here’s what you’ll need

Ingredients

  • 1 cup all-purpose flour
  • 2 tablespoons sugar
  • 2 teaspoons baking powder
  • 1/2 teaspoon salt
  • 1 large egg, lightly beaten
  • 1 cup milk
  • 2 tablespoons unsalted butter, melted and cooled slightly, plus 1 tablespoon for griddle

Directions

  1. Preheat griddle to 375 degrees, or heat griddle pan over medium-high heat. Whisk flour, sugar, baking powder, and salt in medium bowl. Add egg, milk, and 2 tablespoons melted butter; whisk to combine. Batter should have small to medium lumps.
  2.  Test griddle by sprinkling with a few drops of water. If water bounces and spatters, it is hot enough. With paper towel, brush 1/2 teaspoon butter onto griddle. Wipe off excess.
  3. Fill a pastry bag fitted with a 1/4-inch plain round tip with batter; twist end of bag, and secure with rubber band. Working in batches, pipe heart shapes, drawing V of batter in center of hearts to fill, on heated griddle. When pancakes have bubbles on top and are slightly dry around the edges, about 2 minutes, flip over. Cook until golden on the bottom, about 1 minute.
  4. Repeat with remaining batter, using 1/2 teaspoon butter on griddle for each batch, keeping finished pancakes on a heat-proof plate in the oven until ready to serve.

And since it’s mother’s day tomorrow, we’re making our first post an homage to all of our kind-loving-self-sacrificing-but-sometimes-drives-me-crazy-mothers out there. It’s great that we get to do the first post and dedicate it to all the dear mothers … especially to our very own– Mrs. B. It’s like hitting two birds with a Mother rock! Happy mother’s day!

P.S

Why not give this easy recipe a try and surprise your mom with a special breakfast in bed, tell us what you think and how it went…