Halloo, dear lovelies! First of all, my apologies to you guys for this long overdue update as well as to my younger sib, Lyna, who has been constantly nagging, (oops!) lovingly reminding me (nice save! haha) to finally upload a post for this blog.
Anyway, enough with the pleasantries, let’s jump right into our latest adventure–refashioning! Yes, you read that right, REFASHIONING. We got into this hobby just recently about 2-3 months ago while Pinteresting. We stumbled upon a lovely refashionista (cottonandcurls.blogspot.com) which totally got us hooked. Inspired by her upcycles and refashions, we tried our “hand” on refashioning. (Pun intended!) Since we didn’t have a machine then, we did all of our sewing by hand. It took us around 2-3 days finishing projects. I guess seeing clothes take an exciting new form trumps the many knuckle-hurting and needle-pricking moments.
Good thing the parentals got us a pre-loved electric sewing machine in one of our family thrift shopping trips, so I got to finish this project in time for this post! :)Downside is it’s Japanese—- hehehe! Got to tinker with it so we got it to work! Yey!
Btw, before you start on recreating this project, you need to gear up with these stuff:
• button down shirt (I used an oversized long-sleeved one)
• sewing machine or needle and thread
• thread (preferably close to the color to that of your fabric)
• scissors
• flexible measuring tape (I used a ruler.. )
• pins
• marking pen, pencil, or tailor’s chalk (any marking pen would do, just make sure that you use one that wouldn’t leave a permanent mark on your fabric especially when you’re handling delicates or light colored ones)
Optional (these are in case you want to add a tad bit more detail to your blouse)
• extra fabric with the print or color you like (you’ll use this one for lining / piping the edges of the blouse)
• colored buttons
• lace
First thing you need to do is create a pattern:
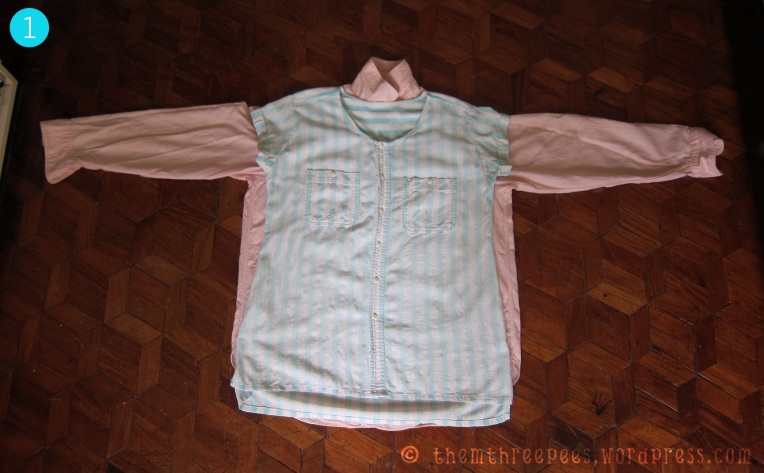
1. Lay your oversized shirt on a surface, making sure that you lay it real flat. After that, place a shirt you like the shape of, on top of the oversized shirt, again making sure it’s flat. This will serve as your pattern. Secure your “pattern” with pins.
2. Getting your chalk, trace around your pattern. Spare a bit for seam allowance. (I gave mine around half an inch.)
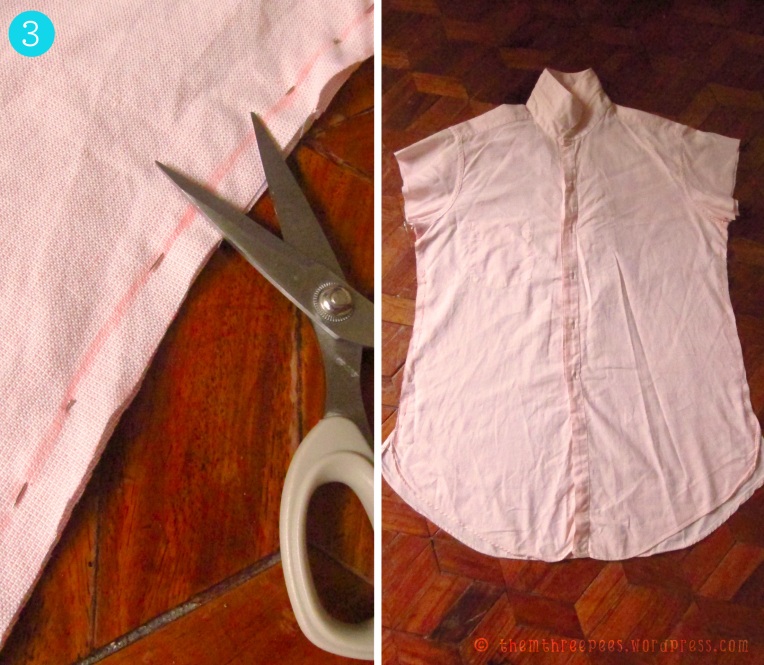
3. Not removing the pins. Cut out the fabric following the edges of your seam allowance. Make sure you cut out a neck line as well.
4. Rip the seams of the pocket and set aside.
Now you can begin on sewing things up:
5. Sew along the lines you traced. (Since I decided on placing a bit of piping on my shirt, I left the neckline out.) Sew the piping on the neckline. (It’ll be a breeze if you iron your piping first so the width would be consistent..)
Hang in there lovelies! We’re almost through! Remember the pocket we set aside in Step 4?
6. Taking your ripped pocket, sew in the details you want placed. (I took the same piping I used on the neckline and a bit of lace.)
7. Pin the pocket on the area where you want it sewn. (I pinned mine facing the mirror, so I can see the effect 😀 ) Sew it in place.
Optional: Sew in colorful buttons on your shirt for a cuter effect!
Voila! A new stylish shirt! 😀
Try it for yourself and show us what you come up with.. 😀


I like your re-fashion! it is quite good. I have a couple of man shirts that I want to refashion and your idea might work for one of them really well. Thanks for sharing! 🙂
You’re very welcome! Very glad you liked it. Will try to throw in more refashioning ideas your way so you can update all of those man shirts hehe 😀
Please do! the more ideas the better 🙂
That turned out SO cute!!!
Thanks SO much! Hey, I checked out your blog and am now pinning it in my blogs to follow list—definitely!
Wow! This is darling. I’m loving the buttons in the back =D
Thanks dear! 🙂
Wow, you are so talented to have created that, and the buttons down the back are gorgeous. Very clever:)
Aww thank you very much! 🙂
Hi there. I knit but I can’t sew. Your project looks really interesting. Look forward to seeing your ingenious works! (^-^)
Halloo there too! Funny thing is I can’t knit–that makes us even 😛 haha
Thanks very much.. watch out for our next post we’re whipping up something new for our Pallet post 😉
This is such a creative project my friend, I love it 😀
Cheers
Choc Chip Uru
Thanks a lot! 🙂
Wow! I need to find asap an old shirt and put my scissors to use BEFORE Mr. comes home… 🙂
Very sneaky! I think you can charm him with the AFTER look you’ll come up with so all will be forgiven! haha.. Good luck!
Cute way to re-do the pocket! 😉
Thanks just used scrap stuff for details. It’s a good thing I never throw anything away that easily! 🙂
Nice way to recycle. 🙂
Love it – my man´s shirts are now no longer safe from me!
I love this…and you make it sound so easy! You’ve inspired me to add this project to my list of crafts to try out!
Great idea! and what a beautiful result!
Thanks!
What a sweet shirt! I love the polka dot piping. My sewing machine is collecting dust. I may have to try this one. Thanks for stopping by Twenty Happy Feet!
Happy blogging,
THF
This is so cute! You’ve inspired me to try this myself. My husbands going to have to keep an eye out because his shirts are about to start disappearing.